Unison Double Ableton Without Recording Again
4. Live Concepts
This chapter introduces the essential concepts of Live. We advise you to read this chapter early in your Live career, as a solid understanding of the program's basic principles will help you fully exploit Live's potential for your music-making.
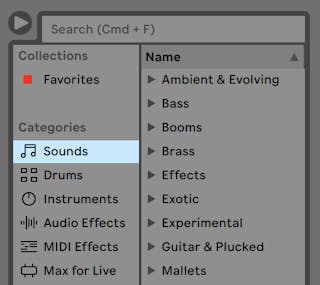
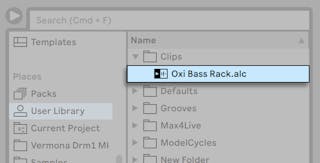
4.1 The Browser
Live's browser (see 5.1) is the place where you interact with your library of musical assets: the core library of sounds that are installed with the program, any additional sounds you've installed via Ableton Packs, presets and samples you've saved, your Ableton and third-party devices, and any folders that you've added manually.
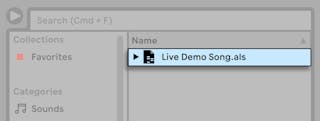
4.2 Live Sets
The type of document that you create and work on in Live is called a Live Set (see 5.5). Live Sets reside in a Live Project — a folder that collects related materials — and can be opened either through the File menu's Open command or via Live's browser.
4.3 Arrangement and Session
The basic musical building blocks of Live are called clips. A clip is a piece of musical material: a melody, a drum pattern, a bassline or a complete song. Live allows you to record and alter clips, and to create larger musical structures from them: songs, scores, remixes, DJ sets or stage shows.
A Live Set consists of two environments that can hold clips: The Arrangement is a layout of clips along a musical timeline; the Session is a real-time-oriented "launching base" for clips. Every Session clip has its own play button that allows launching the clip at any time and in any order. Each clip's behavior upon launch can be precisely specified through a number of settings (see Chapter 14).

The Arrangement is accessed via the Arrangement View (see Chapter 6) and the Session via the Session View (see Chapter 7). If you're using Live in a single window, you can toggle between the two views using the computer's Tab key or their respective selectors. If you're using two windows, pressing Tab will swap the Session and Arrangement from one window to the other.
Because the two views have distinct applications, they each hold individual collections of clips. However, it is important to understand that toggling or swapping the views simply changes the appearance of the Live Set and does not switch modes, alter what you hear or change what is stored.
The Arrangement View and the Session View interact in useful ways. One can, for instance, improvise with Session clips and record a log of the improvisation (see 7.5) into the Arrangement for further refinement. This works because Arrangement and Session are connected via tracks.
4.4 Tracks
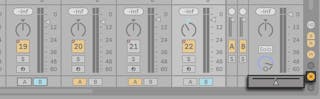
Tracks host clips and also manage the flow of signals, as well as the creation of new clips through recording, sound synthesis, effects processing and mixing.

The Session and Arrangement share the same set of tracks. In the Session View, the tracks are laid out in columns, while in the Arrangement View they are stacked vertically, with time moving from left to right. A simple rule governs the cohabitation of clips in a track:
A track can only play one clip at a time.
Therefore, one usually puts clips that should play alternatively in the same Session View column, and spreads out clips that should play together across tracks in rows, or what we call scenes (see 7.2).

At any one time, a track can be playing either a Session clip or an Arrangement clip, but never both. So, who wins? When a Session clip is launched, the respective track stops whatever it is doing to play that clip. In particular, if the track was playing an Arrangement clip, it will stop it in favor of the Session clip — even as the other tracks continue to play what is in the Arrangement. The track will not resume Arrangement playback until explicitly told to do so.
This is what the Back to Arrangement button is for, which is found in the Master Track in the Session View and at the top-right of the scrub area in the Arrangement View. This button lights up to indicate that one or more tracks are currently not playing the Arrangement, but are playing a clip from the Session instead.
We can click this button to make all tracks go back to playing the Arrangement. Each track in the Arrangement View also has its own Back to Arrangement button, allowing you to resume Arrangement playback of only certain tracks.

We can also capture the current state into the Arrangement by activating the Arrangement Record button. Disengaging Record Mode or stopping Live using the Stop button leaves us with an altered Arrangement.
4.5 Audio and MIDI
Clips represent recorded signals. Live deals with two types of signals: audio and MIDI. In the digital world, an audio signal is a series of numbers that approximates a continuous signal as generated by a microphone or delivered to a loudspeaker. A MIDI signal is a sequence of commands, such as "now play a C4 at mezzo piano." MIDI is a symbolic representation of musical material, one that is closer to a written score than to an audio recording. MIDI signals are generated by input devices such as MIDI or USB keyboards*For an introduction to MIDI and digital audio, please see http://en.wikipedia.org/wiki/Midi and http://en.wikipedia.org/wiki/Digital_audio..
It takes an instrument (see Chapter 19) to convert MIDI signals into audio signals that can actually be heard. Some instruments, such as Live's Simpler (see 26.8), are for chromatic playing of one sound via the keyboard. Other instruments, such as Live's Impulse (see 26.5), have a different percussion sound assigned to each keyboard key.
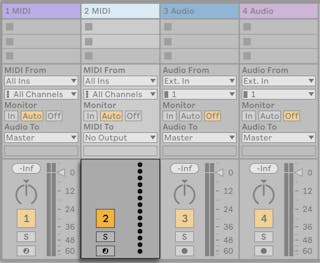
Audio signals are recorded and played back using audio tracks, and MIDI signals are recorded and played back using MIDI tracks. The two track types have their own corresponding clip types. Audio clips cannot live on MIDI tracks and vice versa.
Information about inserting, reordering and deleting audio and MIDI tracks is found here (see 16.2).
4.6 Audio Clips and Samples
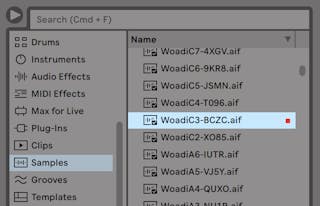
An audio clip contains a reference to a sample (also known as a "sound file" or "audio file") or a compressed sample (such as an MP3 file). The clip tells Live where on the computer's drives to find the sample, what part of the sample to play and how to play it.
When a sample is dragged in from Live's built-in browser, Live automatically creates a clip to play that sample. Prior to dragging in a sample, one can audition or preview it directly in the browser; the switch in the browser with the headphone icon activates previewing.
Live offers many options for playing samples in exciting new ways, allowing you to create an abundance of new sounds without actually changing the original sample — all the changes are computed in real time, while the sample is played. The respective settings are made in the Clip View (see Chapter 8), which appears on screen when a clip is double-clicked.
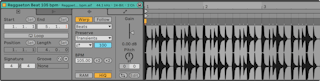
Many powerful manipulations arise from Live's warping capabilities (see 9.2). Warping means changing the speed of sample playback independently from the pitch so as to match the song tempo. The tempo can be adjusted on the fly in the Control Bar's Tempo field.

The most elementary use of this technique, and one that usually requires no manual setup, is synchronizing sample loops to the chosen tempo. Live's Auto-Warp algorithm actually makes it easy to line up any sample with the song tempo, such as a recording of a drunken jazz band's performance. It is also possible to radically change the sonic signature of a sound using extreme warp settings.
4.7 MIDI Clips and MIDI Files
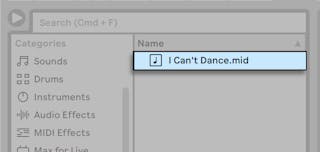
A MIDI clip contains musical material in the form of MIDI notes and controller envelopes. When MIDI is imported from a MIDI file (see 5.3), the data gets incorporated into the Live Set, and the original file is not referenced thereafter. In Live's browser, a MIDI file appears with a special icon, and with the .mid file extension.
As you'd expect, a MIDI clip's contents can be accessed and edited (see Chapter 10) via the Clip View, for instance to change a melody or "paint" a drum pattern.

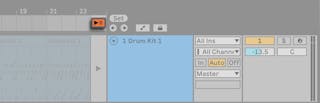
4.8 Devices and the Mixer
A track can have not only clips but also a chain of devices (see Chapter 19) for processing signals. Double-clicking a track's title bar brings up the Device View, which shows the track's device chain.
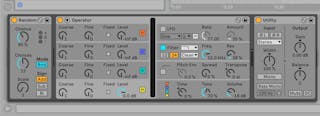
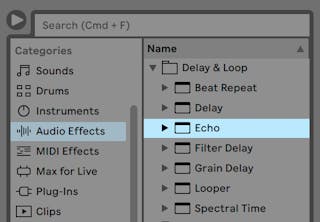
Live's built-in audio effects (see Chapter 24), MIDI effects (see Chapter 25) and instruments (see Chapter 26) are available from the browser and can be added to tracks by dragging them from there into the Device View, or into a Session or Arrangement track.
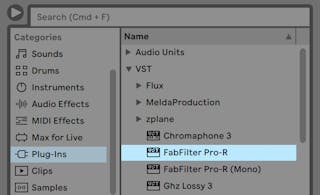
You can also use plug-in devices (see 19.2) in Live. VST and Audio Units (macOS only) Plug-ins are available from the browser's Plug-Ins label.
Consider an audio clip playing in an audio track. The audio signal from the clip reaches the leftmost device in the chain. This device processes (changes) the signal and feeds the result into the next device, and so on. The number of devices per track is theoretically unlimited. In practice, the computer's processor speed imposes a limit on the number of devices you can use at the same time, a topic that deserves separate discussion (see 33.1). Note that the signal connections between audio devices are always stereo, but the software's inputs and outputs can be configured to be mono in the Audio Preferences.
When the signal has passed through the device chain, it ends up in Live's mixer (see 16.1). As the Session and Arrangement share the same set of tracks, they also share the mixer. The mixer can be shown in both views for convenience. To optimize the screen layout, the individual mixer sections can be shown or hidden using the View menu's entries.
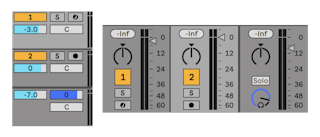
The mixer has controls for volume, pan position and sends, which adjust the contribution each track makes to the input of any return tracks. Return tracks only host effects, and not clips. Via their sends, all tracks can feed a part of their signal into a return track and share its effects.
The mixer also includes a crossfader (see 16.5), which can create smooth transitions between clips playing on different tracks. Live's crossfader works like a typical DJ mixer crossfader, except that it allows crossfading not only two but any number of tracks — including the returns.
Devices that receive and deliver audio signals are called audio effects. Audio effects are the only type of device that fit in an audio track or a return track. However, two more types of devices are available for use in MIDI tracks: MIDI effects and instruments.
Consider a MIDI track playing a clip. The MIDI signal from the clip is fed into the track's device chain. There, it is first processed by any number of MIDI effects. A MIDI effect receives and delivers MIDI signals. One example is the Scale effect, which maps the incoming notes onto a user-defined musical scale. The last MIDI effect in the chain is followed by an instrument. Instruments, for instance Live's Simpler and Impulse, receive MIDI and deliver audio. Following the instrument, there can be any number of audio effects — as in an audio track.

If a MIDI track has no instrument (and no audio effects), then the track's output is a plain MIDI signal, which has to be sent somewhere else to be converted into audio. In this case, the track's mix and Send controls disappear from the mixer.
4.9 Presets and Racks
Every Live device can store and retrieve particular sets of parameter values as presets (see 19.1.1). As presets are stored independently from Live Sets, new presets become part of your user library that any project can draw from.
Live's Instrument, Drum and Effect Racks (see Chapter 20) allow saving combinations of devices and their settings as a single preset. This feature allows for the creation of powerful multi-device creations and effectively adds all the capabilities of Live's MIDI and audio effects to the built-in instruments.
4.10 Routing
As we have seen, all tracks deliver signals, either audio or MIDI. Where do these signals go? This is set up in the mixer's In/Out section, which offers, for every track, choosers to select a signal source and destination. The In/Out section, accessible through the View menu's In/Out option, is Live's "patchbay." Its routing options (see Chapter 15) enable valuable creative and technical methods such as resampling, submixing, layering of synths, complex effects setups and more.
Signals from the tracks can be sent to the outside world via the computer's audio and MIDI interfaces, to other programs that are connected to other tracks or devices within Live. Tracks can also be combined into a Group Track (see 16.3) which serves as a submixer for the selected tracks.
Likewise, a track can be set up to receive an input signal to be played through the track's devices. Again, tracks can receive their input from the outside or from another track or device in Live. The Monitor controls regulate the conditions under which the input signal is heard through the track.
It is also possible to route signals to external hardware devices from within a track's device chain, by using the External Audio Effect (see 24.18) and External Instrument (see 26.4) devices. (Note: these devices are not available in the Lite or Intro Editions.)
4.11 Recording New Clips
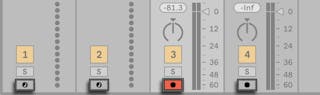
Audio tracks and MIDI tracks can record their input signal and thereby create new clips (see Chapter 17). Recording is enabled on a track by pressing its Arm button. With multiple tracks selected, pressing any of their Arm buttons will arm all of them. You can also hold down the CTRL(Win) / CMD(Mac) modifier when clicking the Arm buttons to arm several tracks at once. If the Exclusive Arm option is enabled in the Record Preferences, inserting an instrument into a new or empty MIDI track will automatically arm the track. When the Control Bar's Arrangement Record button is on, every armed track records its input signal into the Arrangement. Every take yields a new clip per track.
It is also possible to record into Session View slots on the fly (see 17.3.2). This technique is very useful for the jamming musician, as Session recording does not require stopping the music. Clicking the Session Record button records a new clip in the selected Session scene in all armed tracks.

Clicking the Session Record button again defines the end of the recording and launches the new clips. As these actions are subject to real-time launch quantization, the resulting clips can be automatically cut to the beat.

Session recording in conjunction with overdubbing and Record Quantization is the method of choice for creating drum patterns, which are built up by successively adding notes to the pattern while it plays in a loop. It only takes a MIDI keyboard (or the computer keyboard) and a MIDI track with Live's Impulse percussion instrument to do this (see 26.5).
4.12 Automation Envelopes
Often, when working with Live's mixer and effects, you will want the controls' movements to become part of the Set. The movement of a control across the Arrangement timeline or Session clip is called automation (see Chapter 21) ; a control whose value changes over time is automated. Automation is represented by breakpoint envelopes, which can be drawn, edited and recorded in real-time.

Practically all mixer and effect controls in Live can be automated, even the song tempo. Recording automation is straightforward: all changes of a control that occur while the Control Bar's Automation Arm and Arrangement Record buttons are on become automation in the Arrangement View. Automation is recorded to Session View clips if controls are adjusted while recording with the Automation Arm button enabled.
Changing an automated control's value while not recording is similar to launching a Session clip while the Arrangement is playing: It deactivates the control's automation (in favor of the new control setting). The control will stop tracking its automation and rest with the new value until the Re-Enable Automation button is pressed or a Session clip that contains automation is launched.
4.13 Clip Envelopes
Envelopes can be found in both tracks and clips. Clip envelopes (see Chapter 22) are used to automate or modulate device and mixer controls. Audio clips have, in addition, clip envelopes to influence the clip's pitch, volume and more; these can be used to change the melody and rhythm of recorded audio. MIDI clips have additional clip envelopes to represent MIDI controller data. Clip envelopes can be unlinked from the clip to give them independent loop settings, so that larger movements (like fade-outs) or smaller gestures (like an arpeggio) can be superimposed onto the clip's material.
4.14 MIDI and Key Remote
To liberate the musician from the mouse, most of Live's controls can be "remote-controlled" via an external MIDI controller. Remote mappings are established in MIDI Map Mode (see 29.2.1), which is engaged by pressing the MIDI switch in the Control Bar.
In this mode, you can click on any mixer or effect control, and then assign it to a controller simply by sending the desired MIDI message (for example, by turning a knob on your MIDI control box). Your assignments take effect immediately after you leave MIDI Map Mode. Session clips can be mapped to a MIDI key or even a keyboard range for chromatic playing.
MIDI keys and controllers that have been mapped to Live's controls are not available for recording via MIDI tracks. These messages are filtered out before the incoming MIDI is passed on to the MIDI tracks.

Session clips, switches, buttons and radio buttons can be mapped to computer keyboard keys as well. This happens in Key Map Mode (see 29.2.5), which works just like MIDI Map Mode.
Live offers, in addition to this general purpose mapping technique, dedicated support for Ableton Push (see Chapter 30) and Push 2.
4.15 Saving and Exporting
Saving a Live Set saves everything it contains, including all clips, their positions and settings, and settings for devices and controls. An audio clip can, however, lose the reference to its corresponding sample if it is moved or deleted from disk. The links between samples and their clips can be preserved with a special command, Collect and Save (see 5.8), which makes a copy of each sample and stores it in a project folder along with the Live Set.
A separate Save button in the Clip View saves a set of default clip settings (see 8.1.8) along with the sample, so that each time the sample is dragged into the program, it will automatically appear with these settings. This is especially useful if you have made warp settings for a clip and want to use it in multiple Live Sets.
Exporting audio from Live can be done from both the Session and Arrangement Views. By default, Live will export the audio coming through on the Master output as an audio file of your specifications via Export Audio/Video (see 5.2.3).
Live can also export individual MIDI clips as MIDI files (see 5.3.1).
Exporting and saving material for later use in Live can be done very conveniently with the Live Clip format (see 5.4). Session View clips can be dragged back out of a Live Set to the browser, and thereby exported to the disk as Live Clips.
Live Clips are a very powerful way of storing ideas, as they save not only the clip's Clip View settings, but also the corresponding track's instruments and effects chain. Live Clips in the browser can be previewed and added to any open Live Set just like sample files. In the Live Set, they restore the original clip's creative options.
Using Live Clips, you can build your own personalized library of:
- MIDI sequences with matching instruments and effects, e.g., a MIDI drum pattern with the associated Impulse and effects settings;
- Different regions or loops (see 8.2.5) referencing the same source file;
- Variations of a sample loop created by applying Warp Markers (see 9.2), clip envelopes (see Chapter 22) and effects (see Chapter 19) ;
- Ideas that may not fit your current project but could be useful in the future.
girouardondritted.blogspot.com
Source: https://www.ableton.com/en/manual/live-concepts/
0 Response to "Unison Double Ableton Without Recording Again"
Post a Comment